
In today's adventure we'll learn both how to use a drum carder, and the dire consequences of pissing one off. We will make deliberate and stylistic departures from basic English grammar as we go. Hopefully the blatant disdain for our mother tongue will be more of a once-in-a-while gimmick rather than a theme.
First the learning how. I don't actually use my carder as much as I thought I would, but every time I contemplate getting rid of it, I'm struck with the immediate need to card something. I'm going to consider my carder "stash" and thus absolve myself of all need to continue contemplating getting rid of it. Ta Da!
First the learning how. I don't actually use my carder as much as I thought I would, but every time I contemplate getting rid of it, I'm struck with the immediate need to card something. I'm going to consider my carder "stash" and thus absolve myself of all need to continue contemplating getting rid of it. Ta Da!
Step 1: Acquire a drum carder. Mine is a Fancy Kitten purchased on Etsy. I'm going to recommend them wholeheartedly. Love it, love everything about it. Also, sentence fragments. Moving on....
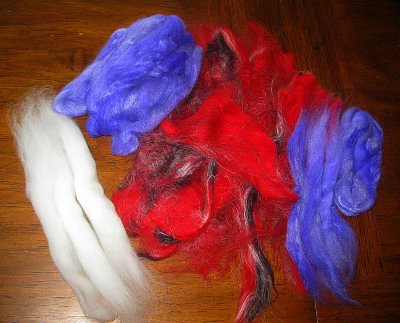
Step 2: Amass all the fiber in your stash that you're sick of looking at and that sort of goes together. The latter isn't super important, but the former is always a good place to start.
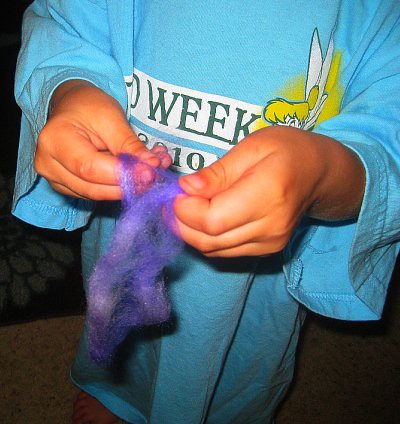
Step 3: Wrangle 4 year old assistant into fiber prep. Before feeding the fiber into the drum carder, you need to separate them into maddeningly thin and wispy layers. 4 year olds are great for this step, but you generally have to promise to let them "help" with the fun parts, too.
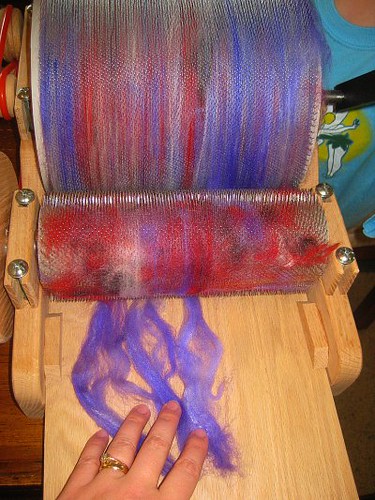
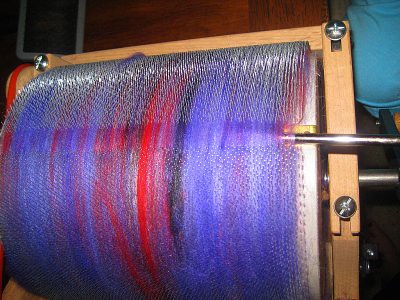
Step 4: Feed the fibers into the drum carder, little by little. Make sure you're getting decent coverage across the width of the drum. The Yarn Harlot has a pretty convincing discussion wherein she entreats you to put the fiber in sideways, but I'm going to air the dirty secret of fiber prep and tell you that it totally doesn't matter.
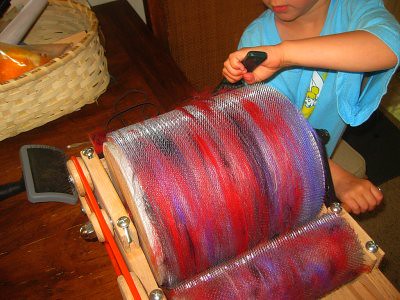
Step 5: Once you've got enough fiber on the drum that it's starting to mound up above those wickedly sharp teeth (this will be an important descriptor here in a couple steps) you need to brush it down. Brushing it, by which I mean getting a cheap, plastic bristle brush and holding against the drum while you turn it, will compact the fibers and let you pack more on there. It will also help align the fibers and smooth them a bit. 4 year olds are good for this step ONLY with LOTS of supervision. Remember the teeth, people.
Step 6: When you've got all the fiber on the drum that it will hold (you can tell because it will become more difficult to turn the drum) you'll need to remove the batt. To do this, use a doffer (read: flathead screwdriver) and slide it under the batt about an inch at a time and gently pull the fibers apart. Pull your doffer straight up so as not to damage the teeth of the carding cloth. There will be a smooth place where the carding cloth joins to itself, slip the doffer in there, don't try and weave it between the teeth. Teeth = bad.

Step 7: When you've got the entire length of the batt separated, begin to roll it up and pull it off the carding cloth. Pull it off the carding cloth in the SAME direction as the evil little teeth are pointing. Trust me on this. Keep rolling it around itself until you end up with what is basically a giant rolag.

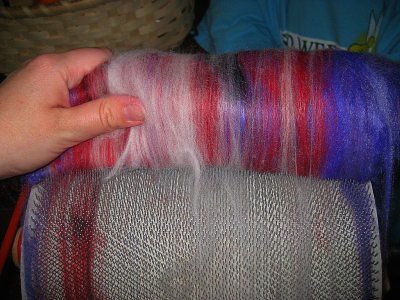
Step 8: Et voila!
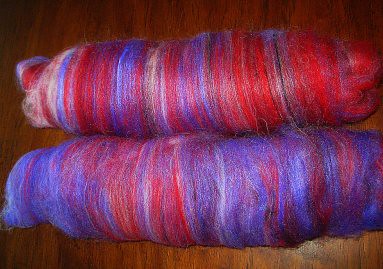
You now have the option of tearing up all that hard work and running it through the carder again. This would give you a more throughly blended batt, and will make your batt a little smoother to spin. I tend to like mine a little more raggedy and the resulting yarn a little less predictable. This could be due to my near complete aversion to extra work, but I'm going to tell people it's a deliberate design choice on my part. Sounds better that way.
Now, remember those teeth? And how I told you to be careful? Well, THIS, my dear Fiberphiles, is what happens when you disregard perfectly good advice.
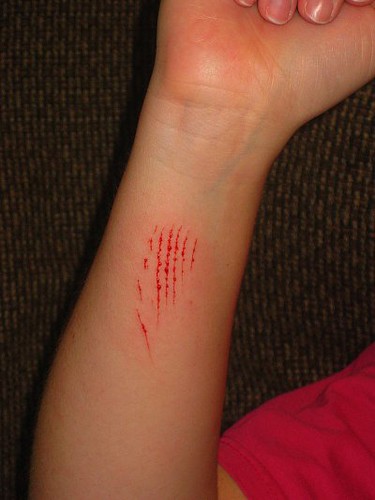
Every once in awhile, it's okay to follow the rules.
Ouch! And I've always wondered how that goes down--thanks for the pics!
ReplyDelete