I won't go into details, but some time ago I started sewing cloth menstrual pads. (if this is an indication that you'd like to skip this post - now is the time :) We cloth diapered the kids, and I made lots of those, so mamapads (or mamacloth, mooncloth what have you) didn't really seem either all that hard, or much of a stretch. I won't go into the numerous benefits of cloth for women, but if you're interested there is lots of information out there.
In any case, I started making them for friends, and eventually for actual paying customers. It's been a pretty successful little side business and I really enjoy it. I love knitting around and around in a circle, and these pads seem to be my sewing equivalent of that.
I've recently had a good friend ask me how I make them. They're super-easy, and ripe for upcycling. Frequently I use old t-shirts. Although, let's be fair, I use either old t-shirts, or my husband's old pants, to make just about everything.
So, here's a down-and-dirty How To Sew Your Own Cloth Pads Tutorial. You don't even need a serger, which is a bonus as I don't have one.
Final note: These pads in the tutorial are NOT the same as the pads I sell. The ones for sale use organic cotton batting for the inners and tend to be a bit softer and a bit more absorbent. But, the ones pictured below work just fine.
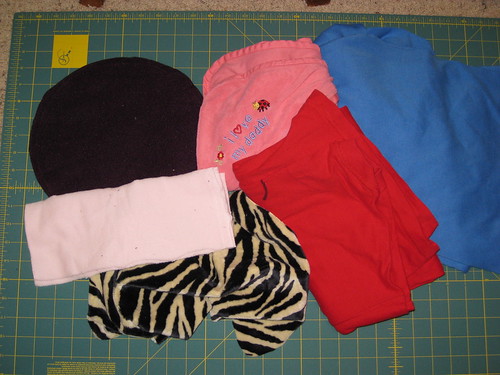
Step 1: Amass your materials. This can involve something as simple as raiding your things-nobody-wears-anymore stash. You need things that are 95-100% cotton. T-shirts with a bit of spandex or lycra are fine, but I wouldn't use them as the very top layer. In this picture (left to right, top to bottom) I've got a circle of purple Malden Mills Fleece, a pink hooded baby towel, some blue knit fabric scraps, some light pink microfleece, a red t-shirt, and some tiger print Minkee.
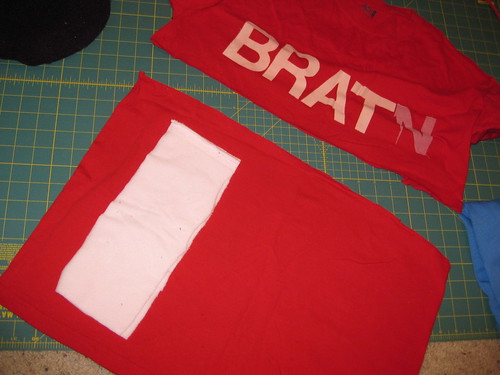
Step 2: Don't try to figure out what's written on the t-shirt, it's an inside joke...and only part of one. I'm laying out all my materials (with the exception of the bottom, water-resistant layer) in a big sandwich. I've cut the bottom off the t-shirt to make it easier to work with. There's also a layer of the blue knit fabric under the t-shirt.
Lay your materials out in the order you want them stacked, bottom layer on the bottom. Top layer on the top. Par example:
________________ <---- microfleece/cotton bamboo/or Minkee (this layer can also be just cotton)
________________ <----- t-shirt layer
________________ <----- t-shirt layer
________________ <----- t-shirt layer
You can put anything that's 100% cotton as the absorbent "t-shirt" layer, and use as many absorbent layers as you wish. You will have to sew through all these layers at the same time, so be a little cautious. 3 or 4 layers of cotton will do a LOT of absorbing.
Step 3: Trace your pattern. And by pattern, I mean a commercial pad, or an elongated oval you've cut out of a paper bag. I'm using a pad I made awhile ago. I also have paper patterns all over the place. Don't make them too wide or they'll just bunch up when you use them. 3 inches across is plenty. Make them as long as you want. I like to have a variety of long and shorter ones at my disposal. The length will be 100% personal preference.
Step 4: Pin your layers together. I have a walking foot on my sewing machine, so I only use a couple pins. If you don't have a walking foot, I'd use way more pins to keep all the layers where you want them.
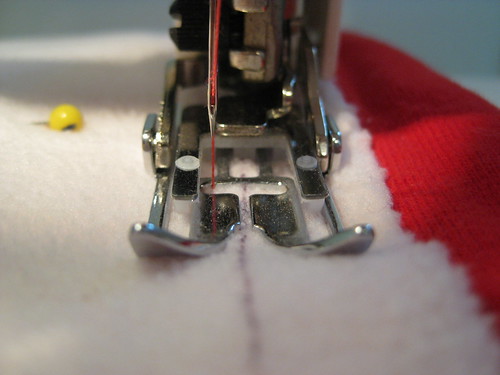
Step 5: Set your needle all the way to the left position. You want your sewing foot to be centered on the black tracing line (I used a sharpie to trace mine) but you want the seam to be a bit INSIDE the tracing line. Sew all the way around like this with a basic straight stitch.
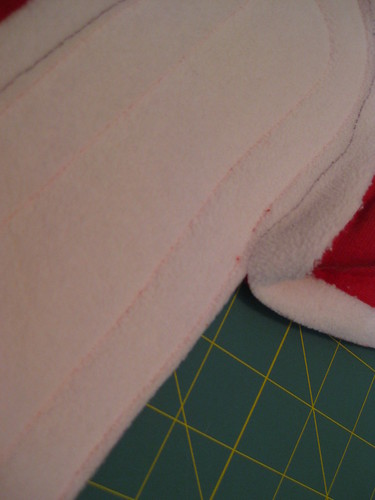
Step 6: When you've sewn all the way around the outside of your oval, use that seam as a guide and sew another oval about an inch (give or take) inside that one. Getting the curves to look good is more art than science. Don't worry if they're wonky, wonky works just as well.
Step 7: Carefully cut your ovals out along the black line, leaving just a fraction of an inch of fabric outside your outer seam.
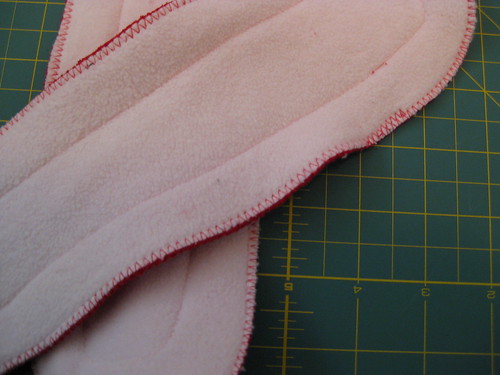
Step 8: Set your machine to the widest zigzag stitch, decreasing the stitch length slightly, and zigzag over the entire edge of your oval. This will give you a nice finished edge. If you've used all knit and fleece fabric, your materials won't fray in the wash. If you've used any flannel, you may get some stray threads out the sides the first couple of times you wash. They usually pull right out, or clip off easily - no worries.
Step 8: Moisture-proofing. You have many many many options for this step. Lots of people like to sew on a Polyurethane Laminate (PUL) backing. I don't like PUL because it doesn't breathe. I like fleece. A lot. I've used all kinds of fleece. Usually, a good microfleece works just fine as a moisture barrier. (if your pads are leaking through the back, you're wearing them too long) I've also used Malden Mills fleece (both 100 and 200 wt.) which is lovely. Cheap anti-pill fleece from the fabric store works too, it just doesn't usually look as nice, and can be a little bulky.
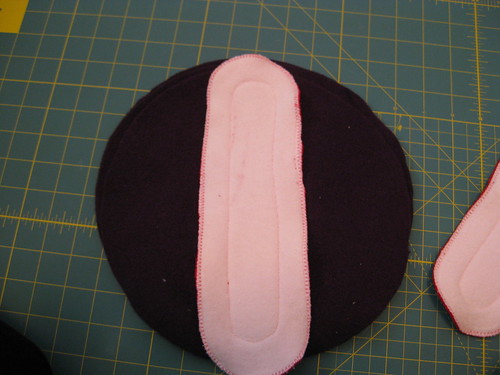
The easiest way to make a backing is to cut a circle of fleece, attach your pad at the top and bottom (use more zigzag stitch,) and you're done. They're a bit bulky this way, but hoo-BOY are they full coverage. Lay the pad in your unders, tuck the flaps down the sides of the crotch, pull and go. If the flaps are a bit much, feel free to trim them down a bit.
Alternately, I've been known to pin my pads to a large piece of fleece, zigzag around the whole thing, and cut them out carefully, adding little wings in the process. Like so (these are some of my very first pads - don't judge!)
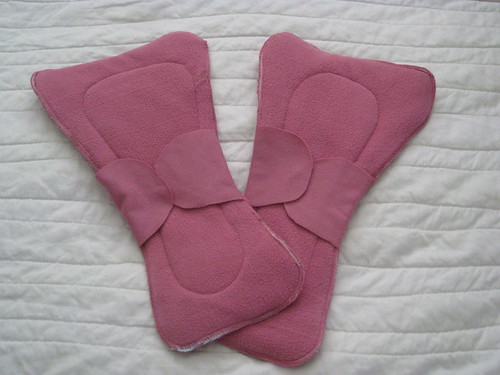
You can vary the size and shape according to your wants/needs. This one below is a post-partum/overnight pad. I think the backing for this one is a thrifted fleece jacket.
That's really, truly, all there is to it. You'll be surprised at how comfortable these are. You can use microfleece, microsuede, or Minkee as a top layer if you'd like a bit more of a stay-dry feeling. All those fabrics are 100% polyester and non-absorbent. Moisture flows through them and is collected in the cotton layers. Minkee is downright heavenly for post-partum use. Oh yeah.
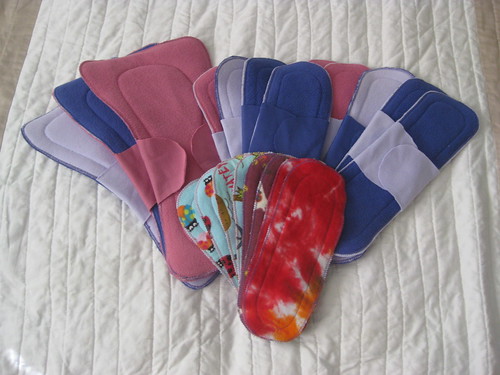
And, since that entire post wasn't revealing enough, I'll leave you with a couple pictures of custom pads I've made and sold!
Happy Sewing!








I just made 4 of these. It's a little too much fun. I think I'm going to end up with way more pads than I can use!
ReplyDeleteHi, 2 years later and I need some more pads and I'm back here for the recipe. Thanks again.
ReplyDelete