Sunday, April 25, 2010

p.s.

Two things.

First - I did NOT take the photo that is the new header.  A very talented young man named Sherwin did.  More on this later.  The yarn is mine, however.  Yeah, I pretty much rock at that.

Second - Someone had "wild hair day" at school on Friday.  While you won't ever see pictures of the kid's faces here on the interwebs, I figured this picture was share-able.  We think we satisfied the requirements for "wild."

Isn't this supposed to be a yarn blog?

Short answer:  yes.

Longer answer: Be quiet.  My mom reads this too (hi mom!), and she needs pictures of lots of things.  Like my garden.  Which shall be the subject of today's sentence fragments.  That and crocheting.  Oh yeah, this is a crocheting blog also.  Oh, like there's something you wouldn't do for YOUR mom.

So, as you may have already discerned, I planted a garden this year.  I do this every year.  It's my annual blood sacrifice to the hungry and vindictive garden deities which likely inhabit North America.  I have yet to actually succeed in growing anything of consequence, unless you count the beans I planted last year on the side of the house and then forgot about.  Those did nicely.

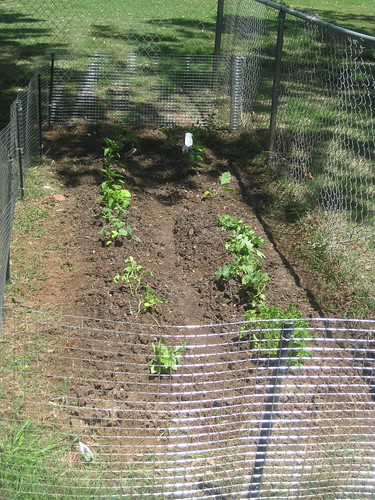
This year, I'm trying something novel with my garden - namely planting it in the ground.  Generally, about this time of year, I manage to convince myself that all the previous years have been a fluke and that I really CAN container garden.  Hence the earlier reference to sacrificial offerings.  Never mind that.  THIS year, Mr. YarnMadeMe and I have spend much of our precious free time digging up a perfectly mostly nice spot in our yard.  The original plan was for a 25'x5' garden plot.  But that was hard.  We went with a more modest 15ish'x4ish'.  I think we're going to get some insidious grass invasions, but I'm choosing to ignore that as this juncture.  Isn't it pretty?  Doesn't it look a lot like a real garden?  Enjoy it, this may the last photo taken of it alive.


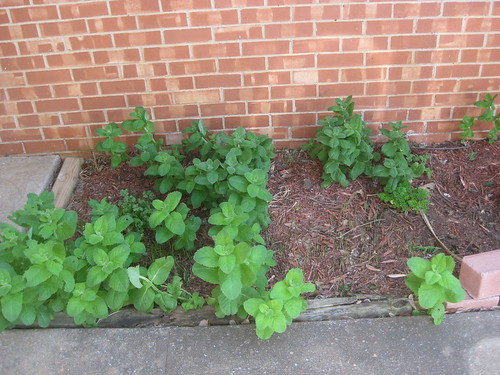
Oh!  I can grow other things too!  Usually things that should be strictly classified as weeds, but who cares?  Success is success.

Here is the mint that I dug up last winter so that I could make room for something different this spring.  I thought I had it pretty well contained.  For reference, this was a pretty barren plot until two weeks ago when I planted some innocent little herbs.  Then, almost overnight, the mint arrived.  What's that you say?  You can't make out the basil, cilantro, and parsley amongst the mint?  You're probably just not looking hard enough.  


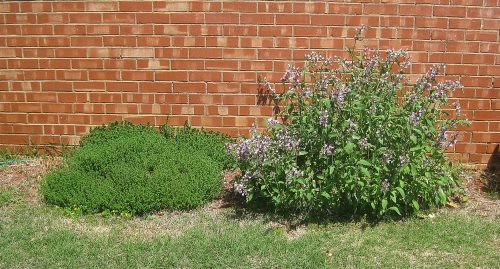
Here's the bountiful sage I put out in front of the house.  I planted this almost two years ago, and haven't touched it since.  That seems to be the secret with me and plants.  As long as I don't get too close, it's all okay.  Anyhoo, it's flowering and gorgeous right now and making me very happy.  


If you look to the right of the sage (which is about 4 feet high - really) you can see the little sprig of thyme I put in about the same time.  The lady at the farmer's market said it would spread.  And how.   It's very tasty.  


To complete our garden tour, here's a picture of the hostas we put out back in the shady strip along the patio where nothing will grow.  They love it there.  Mr. YarnMadeMe takes care of them.  You can tell because they still look good. 


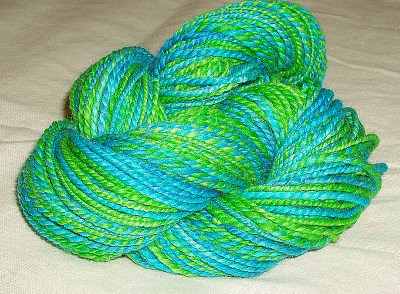
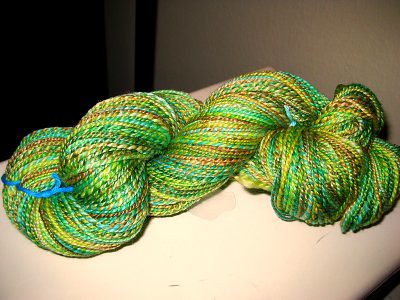
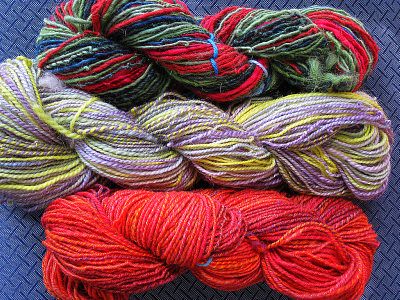
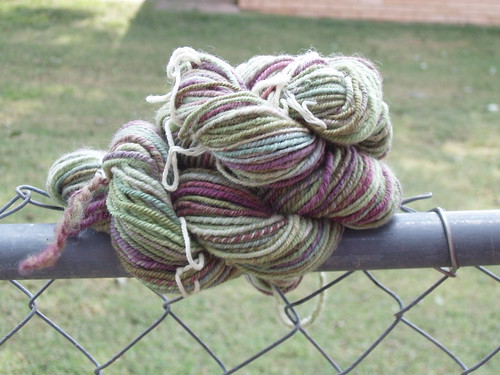
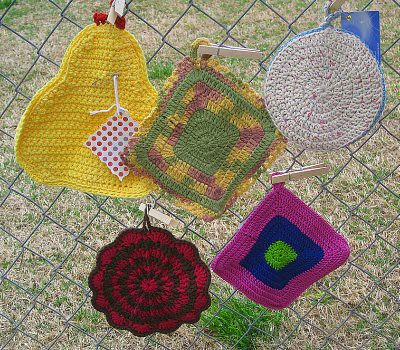
Now, as promised, something made of yarn!!

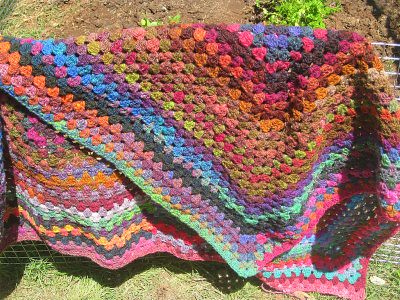
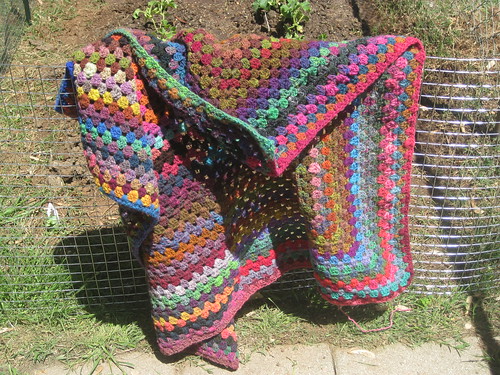
I saw this idea somewhere on Ravelry.  It's just a giant granny square of yarn scraps and called a blanket.  I've become slightly addicted to Noro.  This blanket represents approximately $300 worth of Noro so far.  That may be a slight exaggeration, but it's not done yet.  This will be much easier to grow than anything else I've shown you today, and probably won't die on me.  It's a lousy sacrifice, but a pretty wonderful blanket.  


Stay tuned.  I do have actual yarn content planned for the near future.  But for now, it's all about mom.  (bye mom!)

Tuesday, April 20, 2010

Yarn Photography

Or alternately: Things At Which I am No Good.

As you've surely already surmised, gracious reader, I am no kinda photographer.  Also, my proofreading skills are pretty lacking, but we'll get to that later.

I'm using flickr for photo-hosting purposes, which is nice, as it seems fairly idiot- (me-) proof.  I've even figured out how to edit my mangled attempts at representative photography.  Go, me!

So, I thought, in today's post we could join together in looking at past and depressing examples of my yarn photos, so everyone can at least see how far I've come.  THEN, we can all gaze upon my newer photos and exclaim "bless her heart, she tries so hard!"  


Here we go.  Exhibits A and B are actually shockingly (or at least noticeably) different yarns in person.  See?


Now, in these next two photos, I've discovered the effectiveness of a white background in making my photos particularly retina-searing.  The blue-green yarn is pretty bright in person, but it's got nothing on this photo.  The red looks more pink, and less capable of a half-life here on this side of reality.  But, hey, at least I'm learning!  And, if kindergarten has taught us anything, it's to just try your best.


So, I tried a warmer quality light to tone down the nuclear tendencies...


Then I thought "maybe light from above will work!"  You be the judge


So, I moved the whole operation outside.  You need natural light to get good pictures, so says the internet.  Well, the internet should also tell you that you need a competent photographer...  But, hey, they're a little better, yes?


Now we tackle composition and not-horrible-folding-chair-left-in-the-sun-for-years as a background.  Closer, but still nothing like the yarn here in real life.


And then it hits me.  SNOW!  Snow is perfect!  It's nature's lightbox!  And my husband has a new camera I can appropriate, how could I possibly fail?!?


Ahhhh...that's much better. 

Don't get overly excited however.  You will still see way more of my fence-as-backdrop than anyone deserves.  And, unless my best friend or my dad miraculously moves to Oklahoma to be my photographer, you're going to have to subsist on sub-par photographs at least until next winter.  But that's okay, you love me for my personality, right?  Right?

Thursday, April 15, 2010

Batt-er Up!


In today's adventure we'll learn both how to use a drum carder, and the dire consequences of pissing one off.  We will make deliberate and stylistic departures from basic English grammar as we go.  Hopefully the blatant disdain for our mother tongue will be more of a once-in-a-while gimmick rather than a theme.

First the learning how.  I don't actually use my carder as much as I thought I would, but every time I contemplate getting rid of it, I'm struck with the immediate need to card something.  I'm going to consider my carder "stash" and thus absolve myself of all need to continue contemplating getting rid of it.  Ta Da!

Step 1: Acquire a drum carder.  Mine is a Fancy Kitten purchased on Etsy.  I'm going to recommend them wholeheartedly.  Love it, love everything about it.  Also, sentence fragments.  Moving on....

Step 2: Amass all the fiber in your stash that you're sick of looking at and that sort of goes together.  The latter isn't super important, but the former is always a good place to start.  


Step 3: Wrangle 4 year old assistant into fiber prep.  Before feeding the fiber into the drum carder, you need to separate them into maddeningly thin and wispy layers.  4 year olds are great for this step, but you generally have to promise to let them "help" with the fun parts, too.


Step 4: Feed the fibers into the drum carder, little by little.  Make sure you're getting decent coverage across the width of the drum.  The Yarn Harlot has a pretty convincing discussion wherein she entreats you to put the fiber in sideways, but I'm going to air the dirty secret of fiber prep and tell you that it totally doesn't matter.  


Step 5: Once you've got enough fiber on the drum that it's starting to mound up above those wickedly sharp teeth (this will be an important descriptor here in a couple steps) you need to brush it down.  Brushing it, by which I mean getting a cheap, plastic bristle brush and holding against the drum while you turn it, will compact the fibers and let you pack more on there.  It will also help align the fibers and smooth them a bit.  4 year olds are good for this step ONLY with LOTS of supervision.  Remember the teeth, people.  


Step 6: When you've got all the fiber on the drum that it will hold (you can tell because it will become more difficult to turn the drum) you'll need to remove the batt.  To do this, use a doffer (read: flathead screwdriver) and slide it under the batt about an inch at a time and gently pull the fibers apart.  Pull your doffer straight up so as not to damage the teeth of the carding cloth.  There will be a smooth place where the carding cloth joins to itself, slip the doffer in there, don't try and weave it between the teeth.  Teeth = bad.


Step 7: When you've got the entire length of the batt separated, begin to roll it up and pull it off the carding cloth.  Pull it off the carding cloth in the SAME direction as the evil little teeth are pointing.  Trust me on this. Keep rolling it around itself until you end up with what is basically a giant rolag.  


Step 8:  Et voila! 


You now have the option of tearing up all that hard work and running it through the carder again.  This would give you a more throughly blended batt, and will make your batt a little smoother to spin.  I tend to like mine a little more raggedy and the resulting yarn a little less predictable.  This could be due to my near complete aversion to extra work, but I'm going to tell people it's a deliberate design choice on my part.  Sounds better that way.  

Now, remember those teeth?  And how I told you to be careful?  Well, THIS, my dear Fiberphiles, is what happens when you disregard perfectly good advice.


Every once in awhile, it's okay to follow the rules.  

Sunday, April 11, 2010

The Kindness of Strangers

Last week was just plain lousy.  So, we're going to focus instead on the shining moment at the end of the week when my faith in humanity was restored in spades.

I participated in the 2nd great Potholder Swap on Ravelry.   Each participant crochets five potholders in the same pattern and mails them to Adrian of HelloYarn.  Adrian mixes them up and sends each participant 5 different potholders from various other participants.  It's genius!  And fun!

I crocheted my heart out for two weeks and sent my creations out into the wild to find new homes.  (Before I'd gotten a picture, blarg!)  After forgetting about the whole business, and having the week from total crap, I came home to a package!  A package for me!


And the B side:


Inside were 5 fantastic potholders, each created with love by a perfect stranger for someone they'd never met.  Each sent out into the world to find their fortunes, and ending up at my house.  I truly hope Karma is paying attention.  Fellow Crocheters, I could kiss each and every one of you.  Thanks for reminding me of the good out there in the Universe.

And, as if potholder love from strangers wasn't enough, added to my self-adressed, stamped envelope, was a 10 cent stamp.  Adrian, having discovered that I'd shorted the postage, quietly and generously fixed it.  She mailed almost 90 packages that day, and still took the time to fix mine.

I'm not always this sappy, but today I feel it's more than a little appropriate.